The multicolor powder material for 3D printing allows you to print multi-color models, even with photographic quality.
How to color our model? How to save the file correctly? With this guide we will see how simple it is to create a toy or a figurine, even using an open source program.
This tutorial is based on Blender but it is also applicable to other 3D software.
Contents of the guide:
[unordered_list style = "tick"]
UV mapping
To apply a color to a 3D model, you use a .jpg or .png image that is projected onto the model through a UV map that correlates the points of the 2D image to those of the 3D model: practically the image wraps the model, as if we made a sheet of printed paper adhere to a three-dimensional object until it was bandaged.
To create this UV map, a command that can be called with is used U. Various options are available but the most common use is mode unwrap.
To make it possible unwrap the object must be in its editable state, Edit mode, selected from the interaction menu.
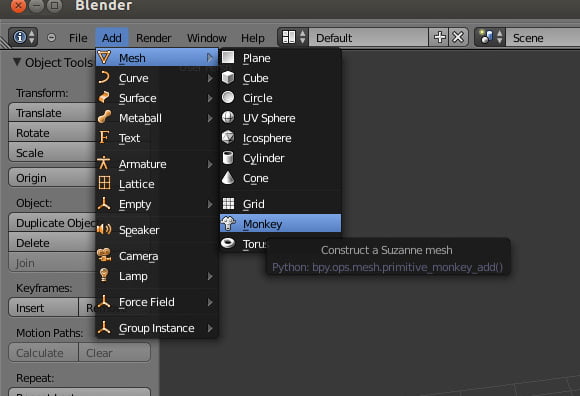
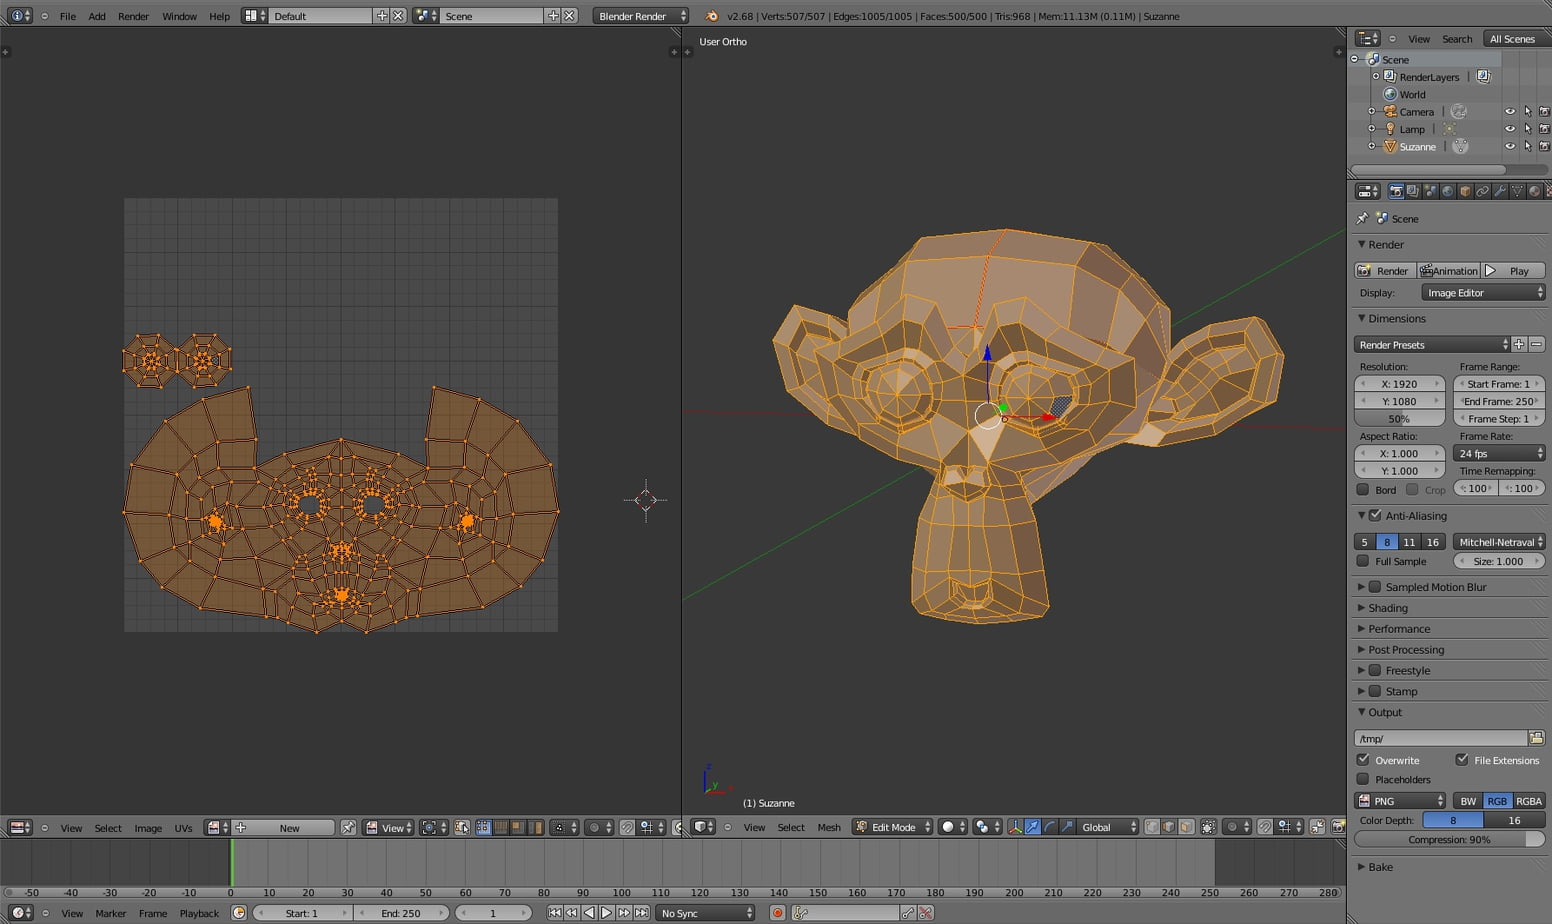
We will use the primitive in this example Suzanne, the snout of the little monkey included in Blender.
Add mesh> monkey
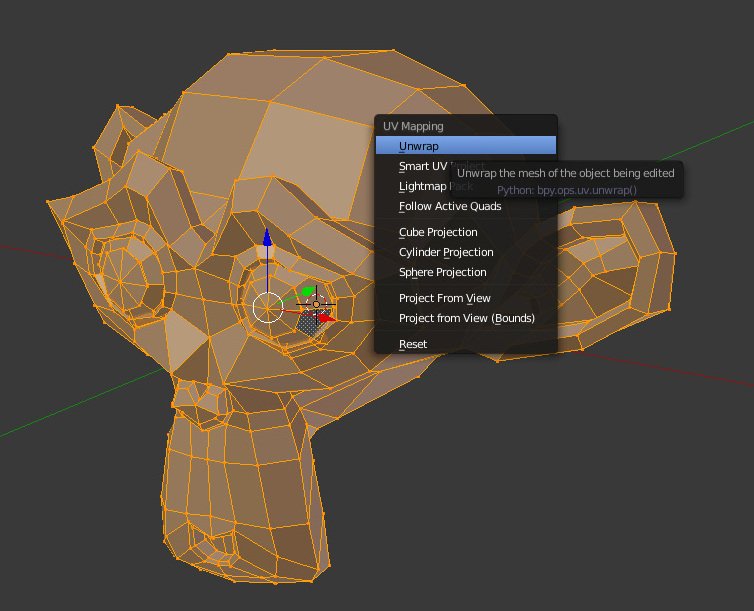
You select all vertices with to, with u you open the UV mapping menu and click unwrap.
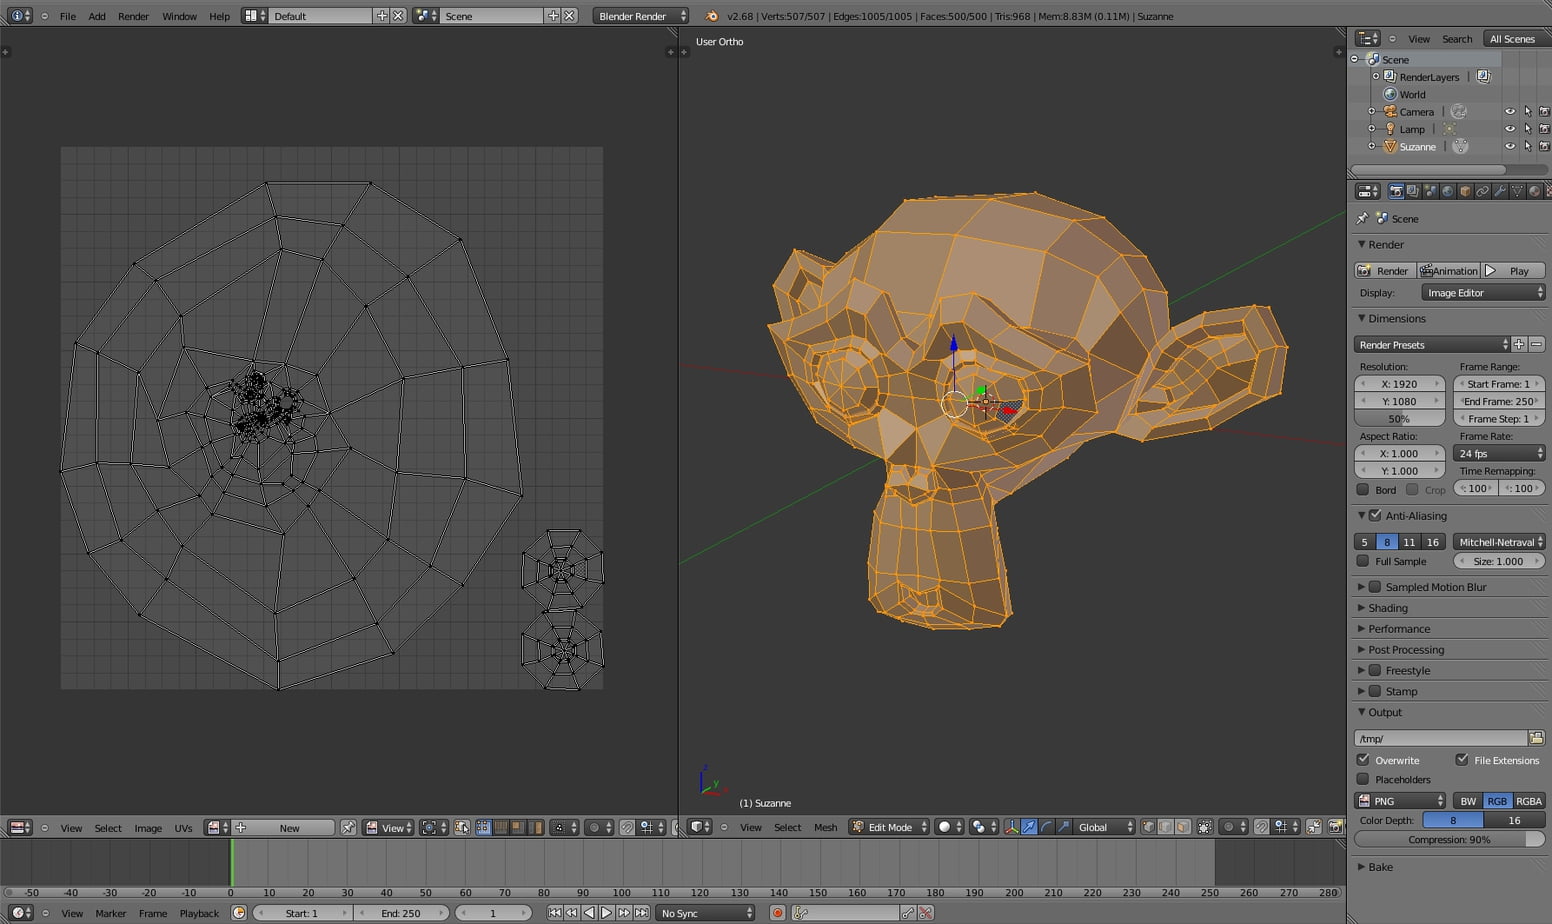
To see the UV map created, another window opens in the wievport.
To do this you go to one side of the current viewport until one appears double freccina, click with the right button and open a menu, choose split area.

Now that the window is open let's go into the mode and let's talk UV / image editor.

Here we can see our UV.
Returning to UV we can give guides to generate it with some development. To do this we have to select the sides that will work as cuts in the map.
We select the sides with c: once selected, we press Ctrl e and a menu will appear from which we will have to select Mark seam.
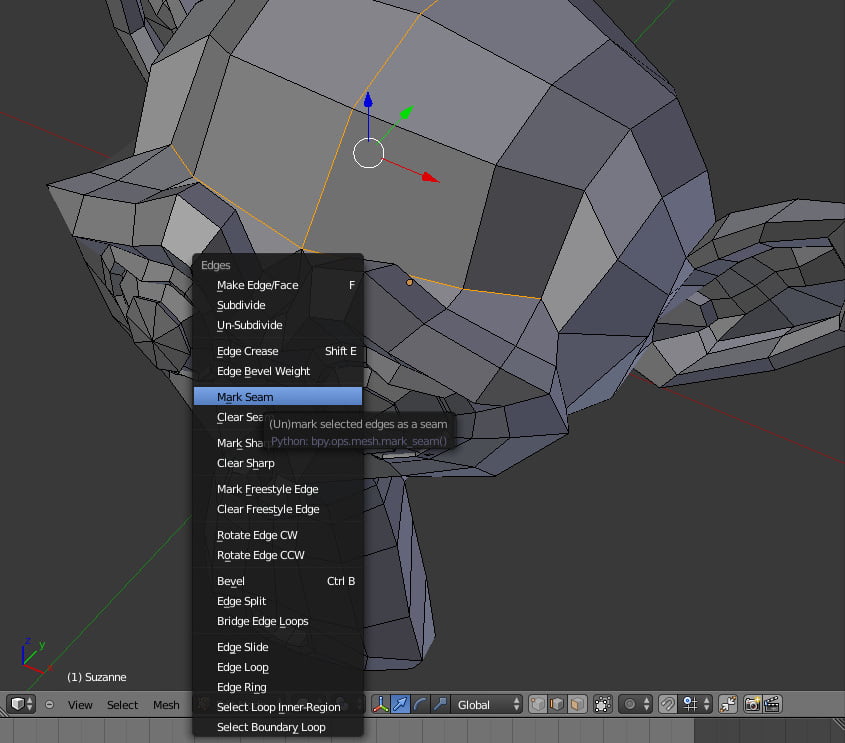
Now the selected sides will be highlighted in red.
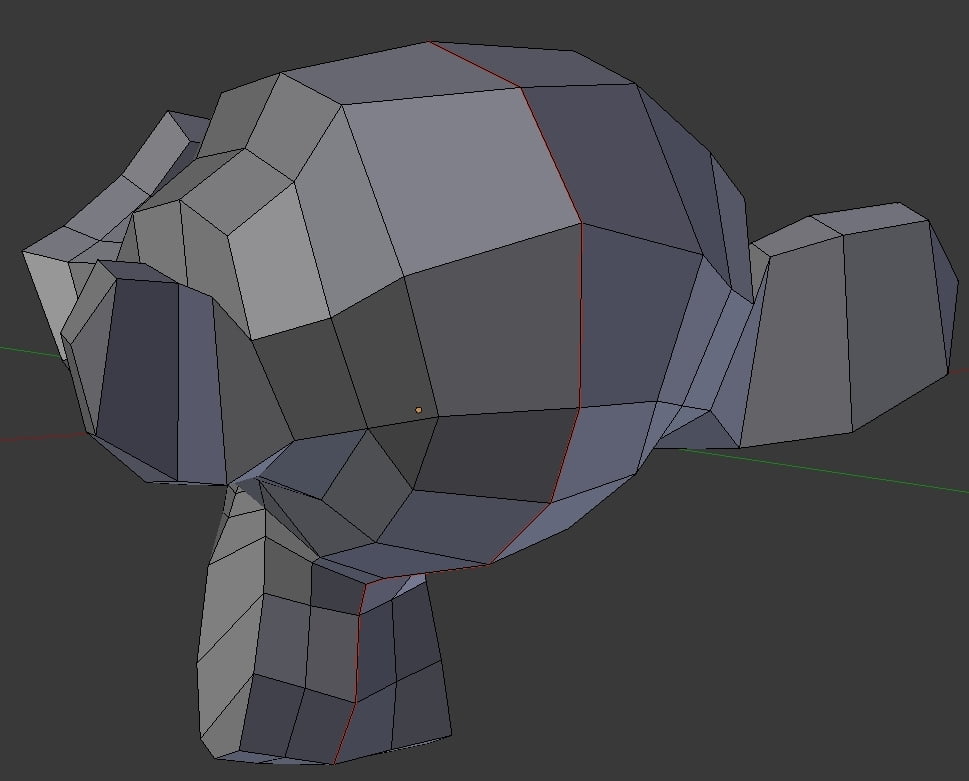
Reapply theUV unwrapping, and we will see that the Uv map will take on a new shape.
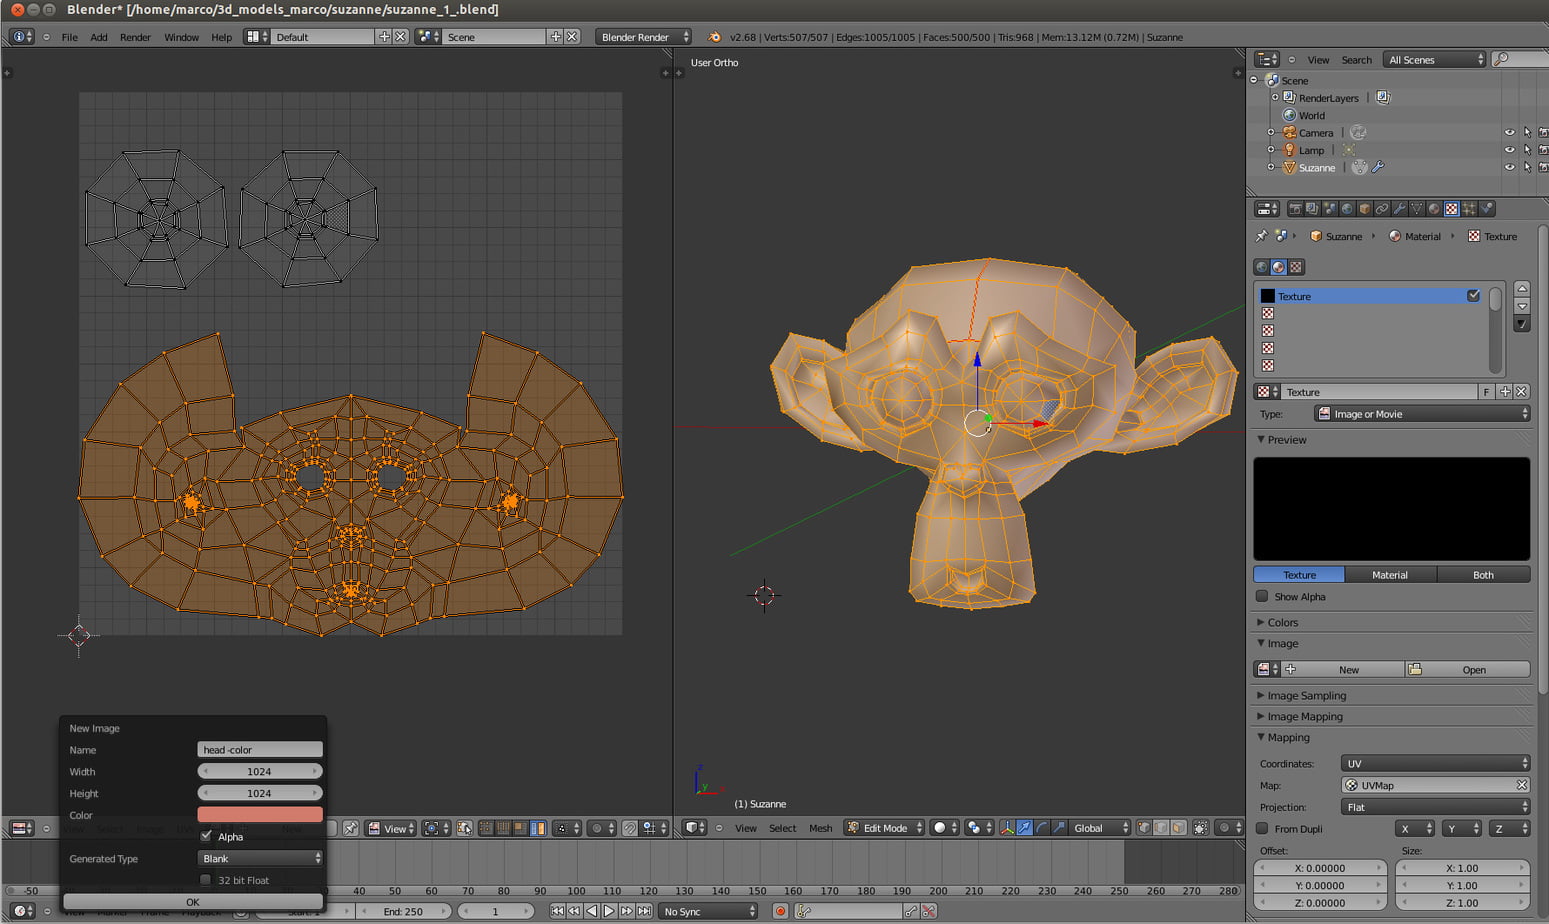
Once our UV map is generated, we can apply an image to our model. We can use specially created bitmap images or even photographs.
To do this, in Blender Internal, let's create a first one new material, then one textures, we select image or movie, we open the image, in the mapping section, we choose UV and the name of our UV (usually UVmap).
At first, Blender may seem complicated and not very intuitive, but once you have acquired a bit of familiarity, it turns out to be a very complete software, with which you can create everything you can imagine.
Texture painting technique
Blender gives us the possibility to act with colors directly on the model. Do we want to add a bit of makeup to our character?
We can do it using the mode texture painting, with which we can paint our 3D model in real time by rotating the model in space.
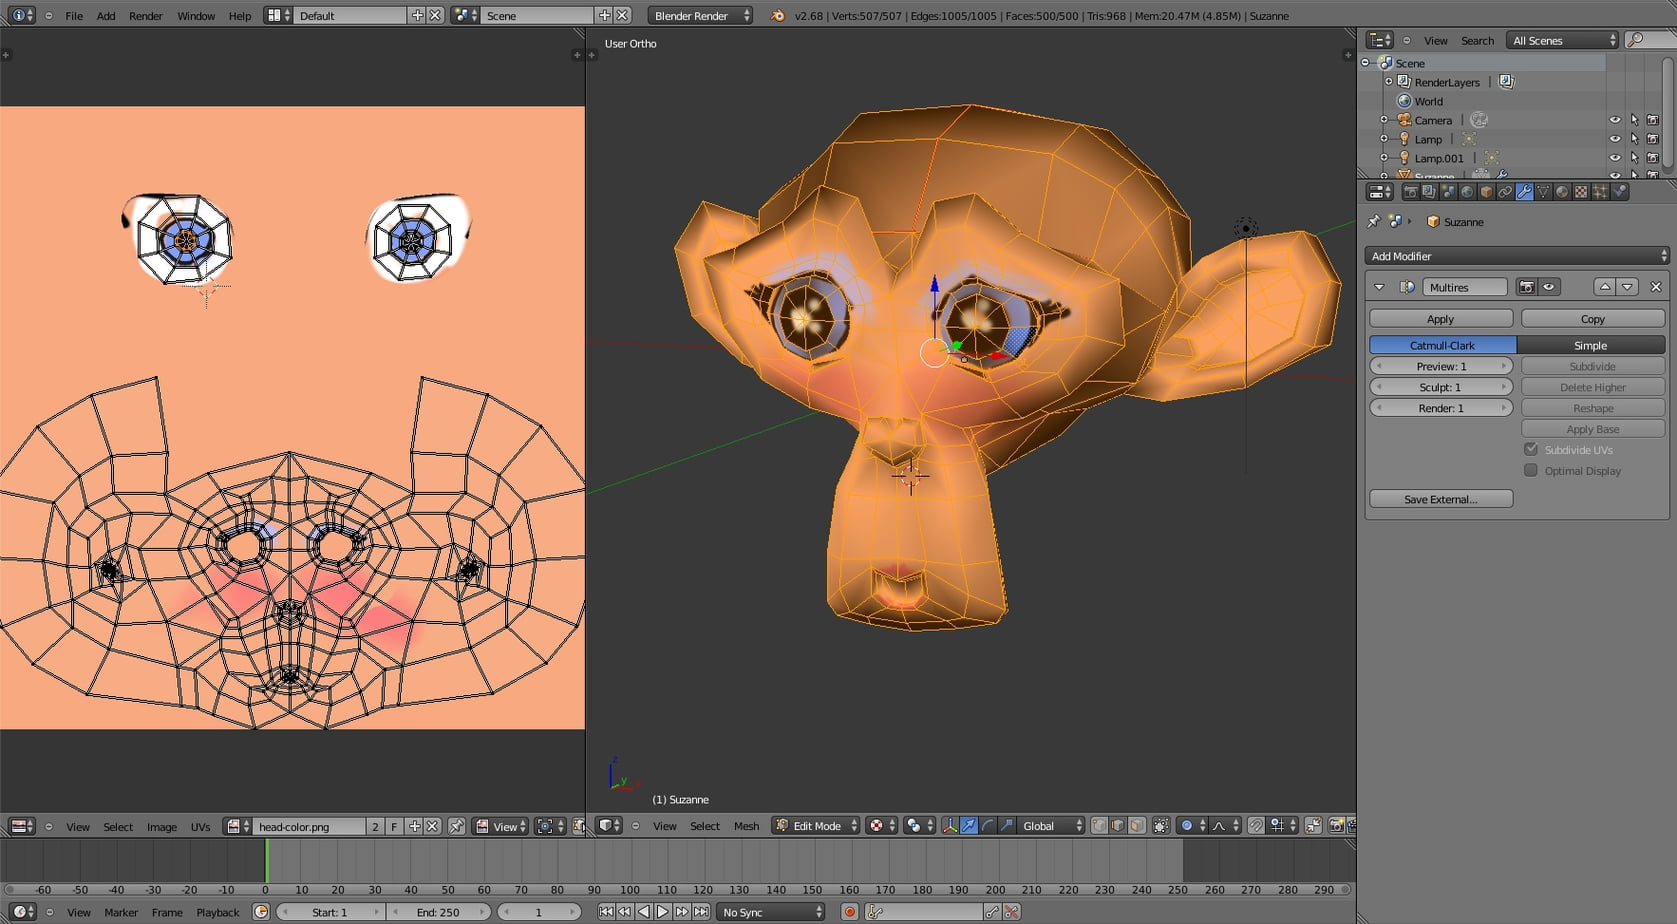
To do this, let's go into the mode edit mode, we select all vertices with to, let's go to the window UV image editor and here we create a new image, giving it a name. We select the image size (1024 x 1024 can be fine), we choose a color as a base.
Now let's go in 3D wievport and select the mode texture painting.
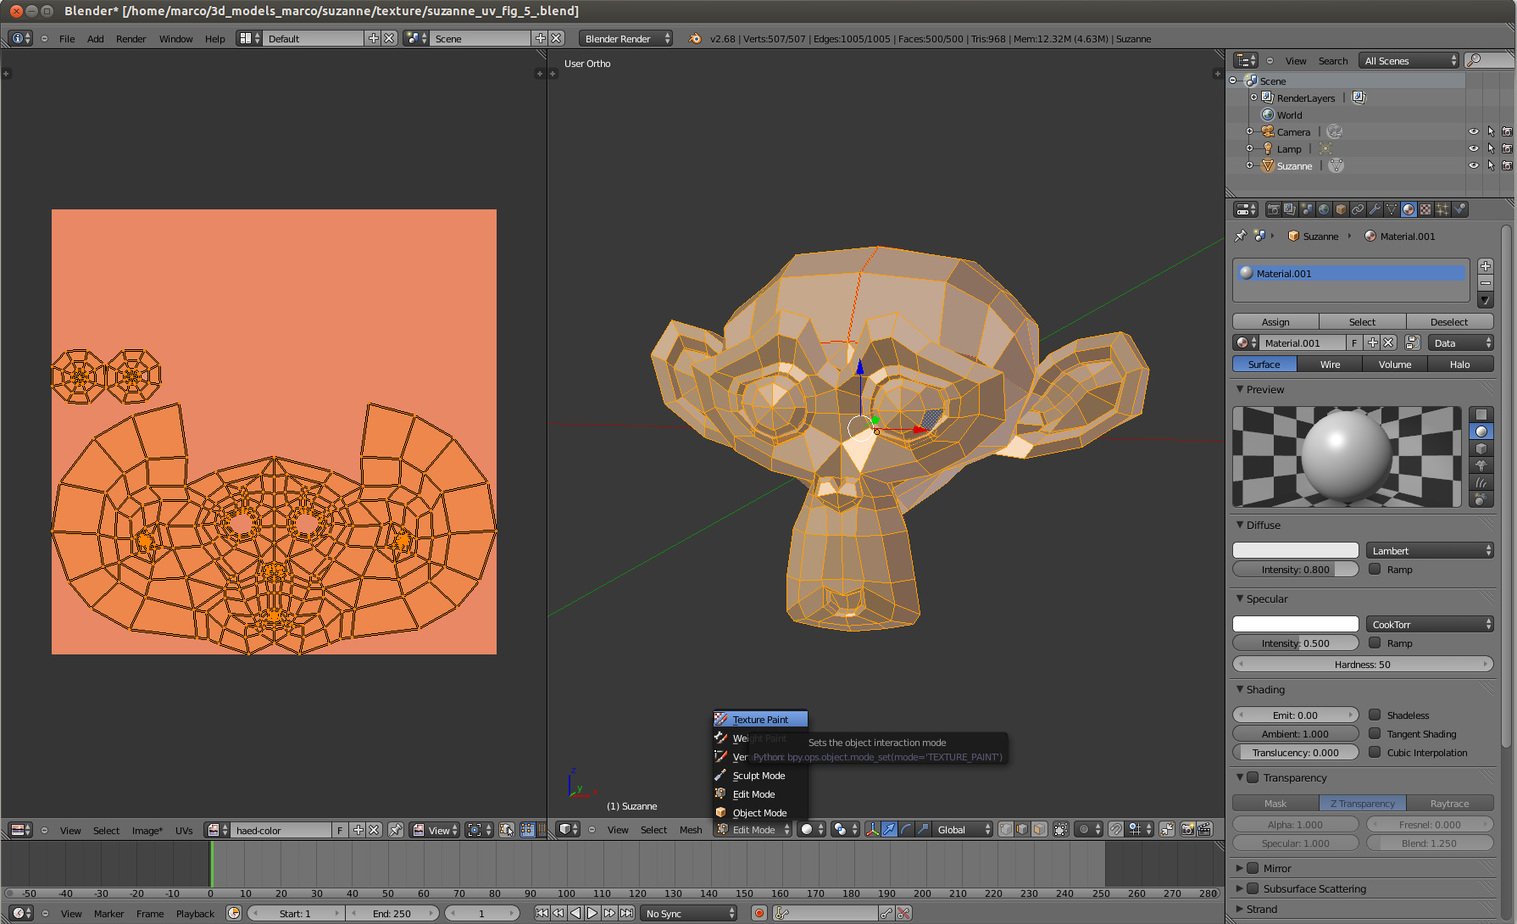
An interface to paint will appear in the menu on the left. The menu can be recalled with t.
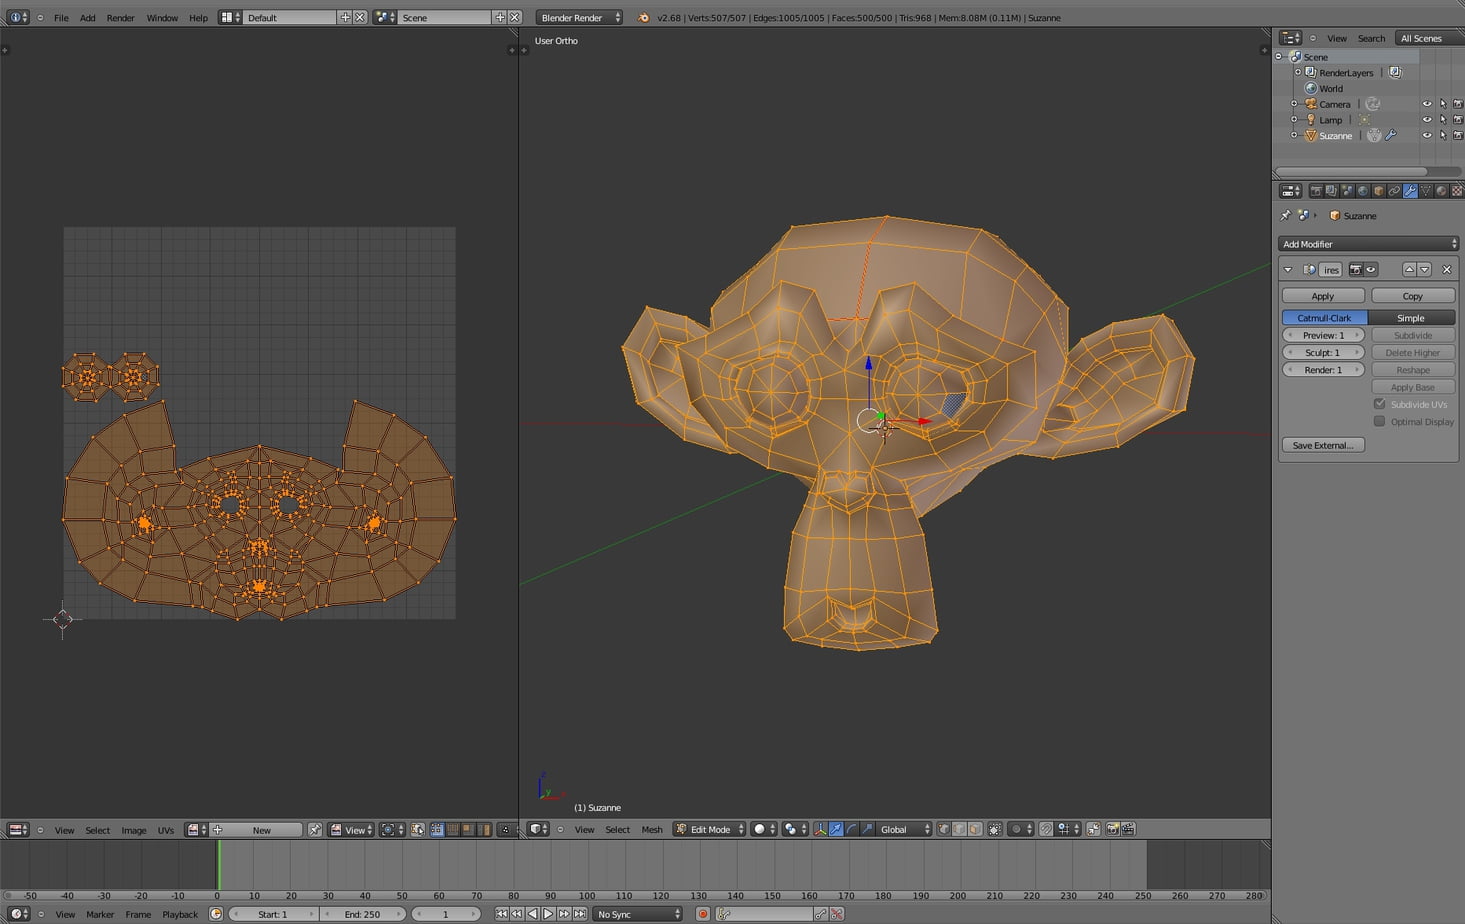
To better paint on the model we apply a multiresolution modifier and click on subdivide.
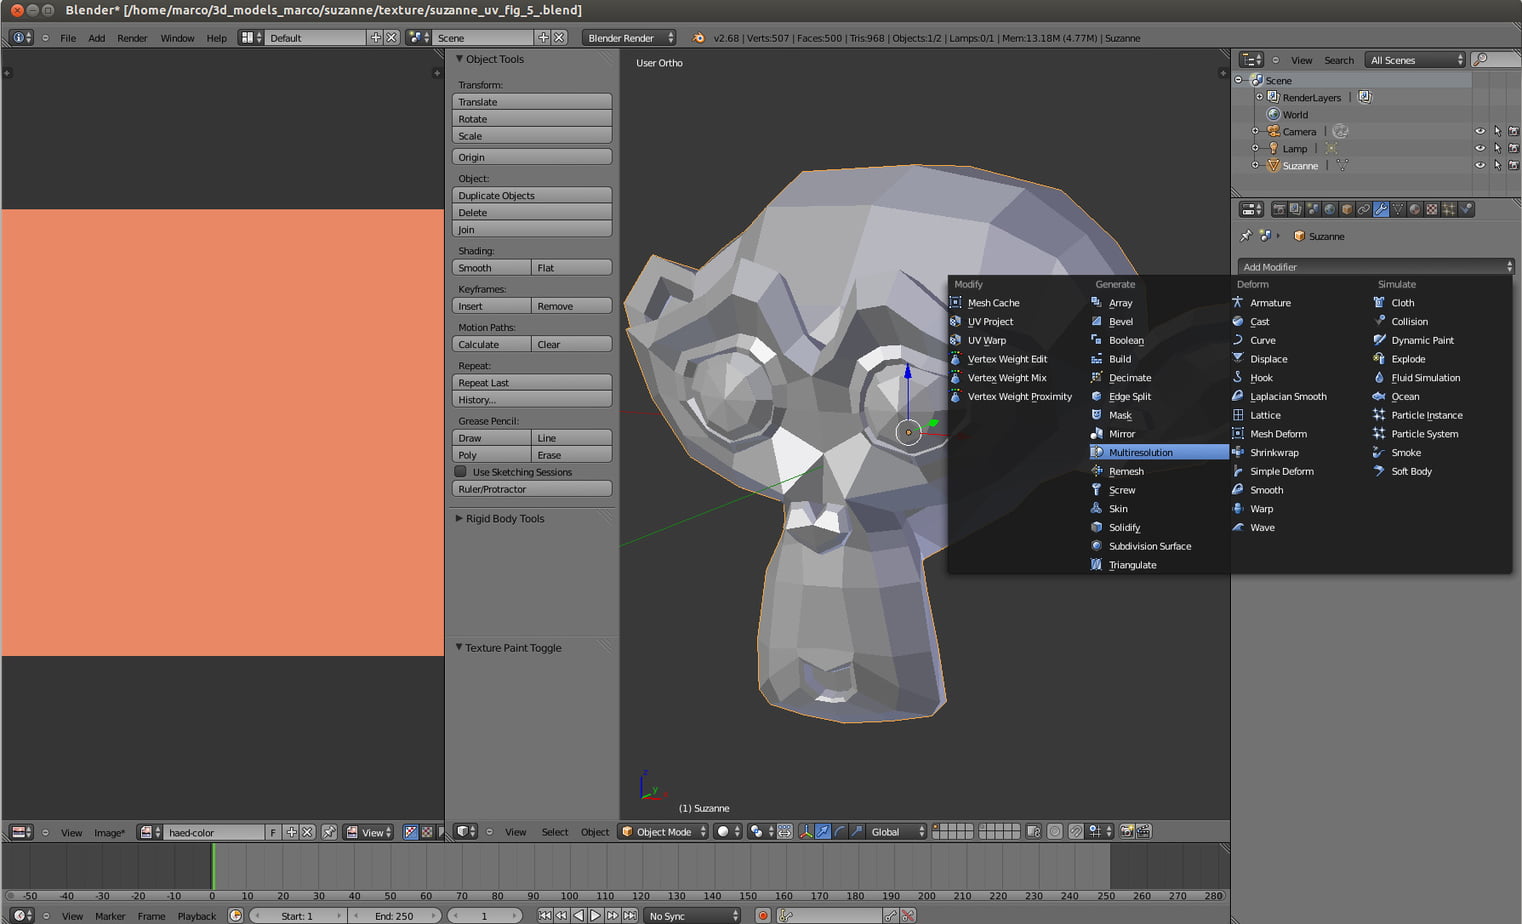
The model may appear to be facet. We click on to make it softer and softer smooth in shading in the menu on the left that can be recalled with t.
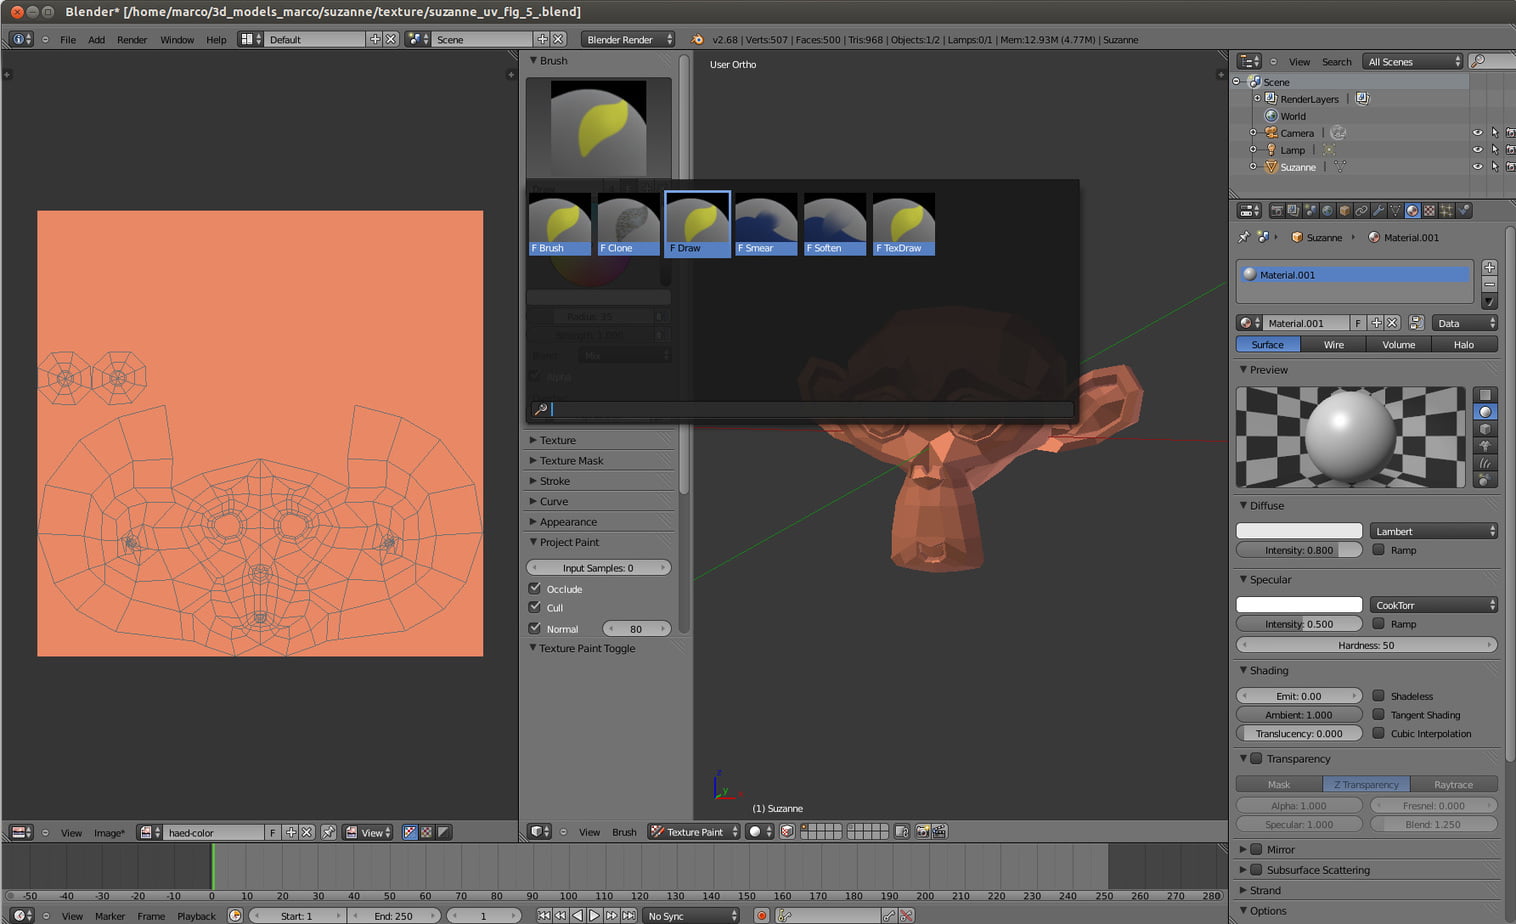
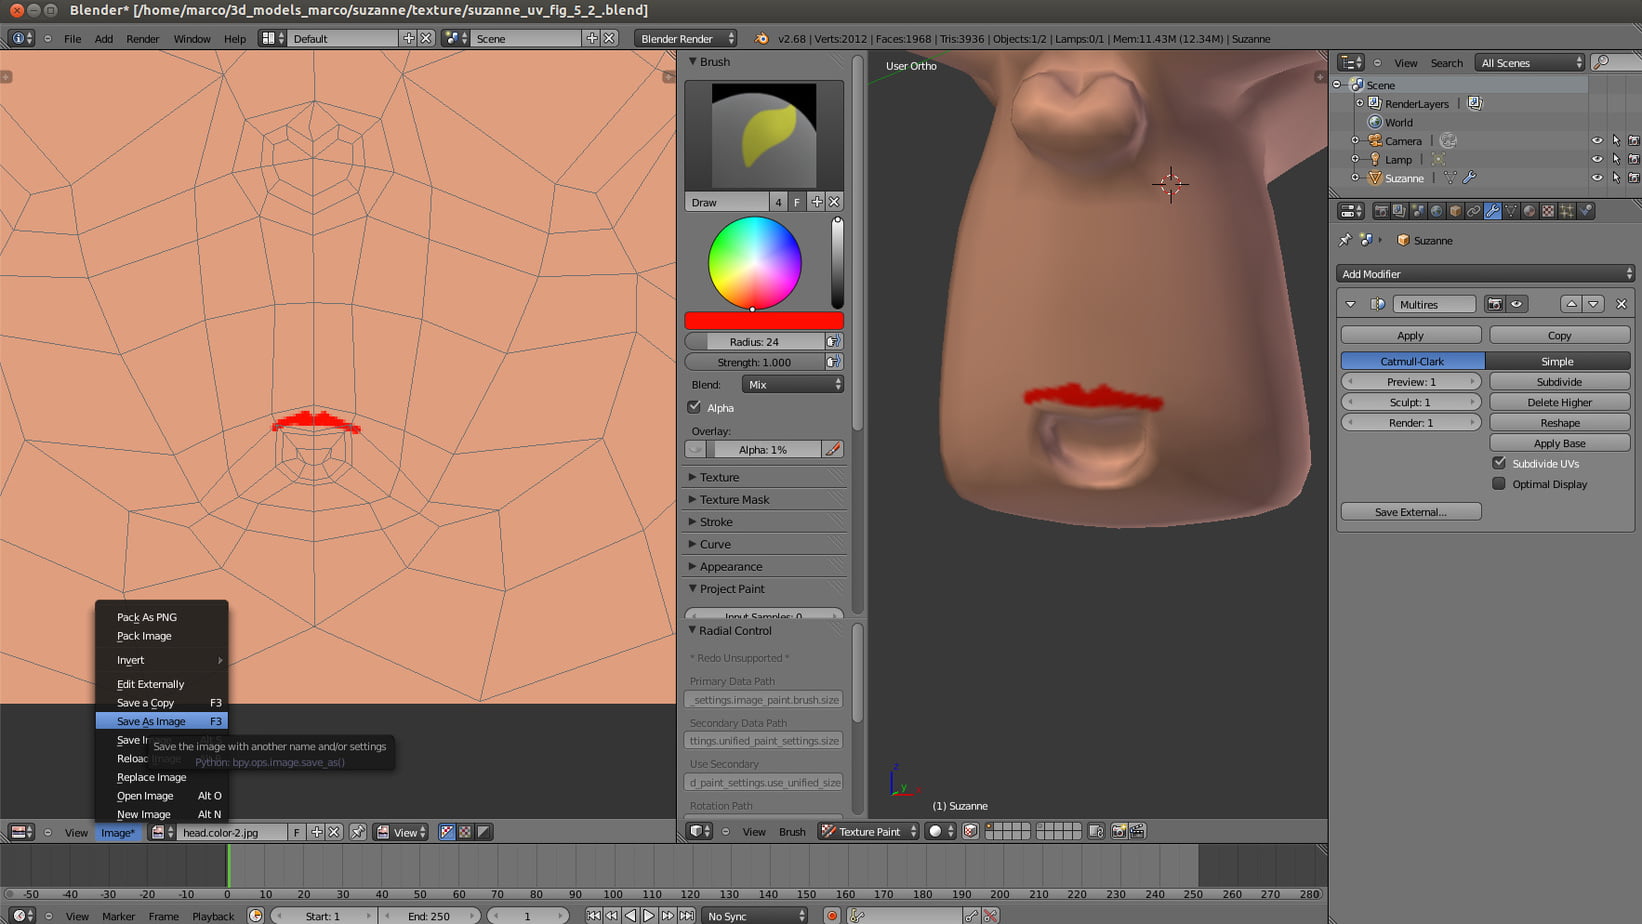
There are various brushes available, to give different effects. Seezioniamo F.draw. We select a color (in this case we chose red) and let's paint with the brush directly on the model.
With F we can, by dragging the mouse, increase or decrease the size of the brush.
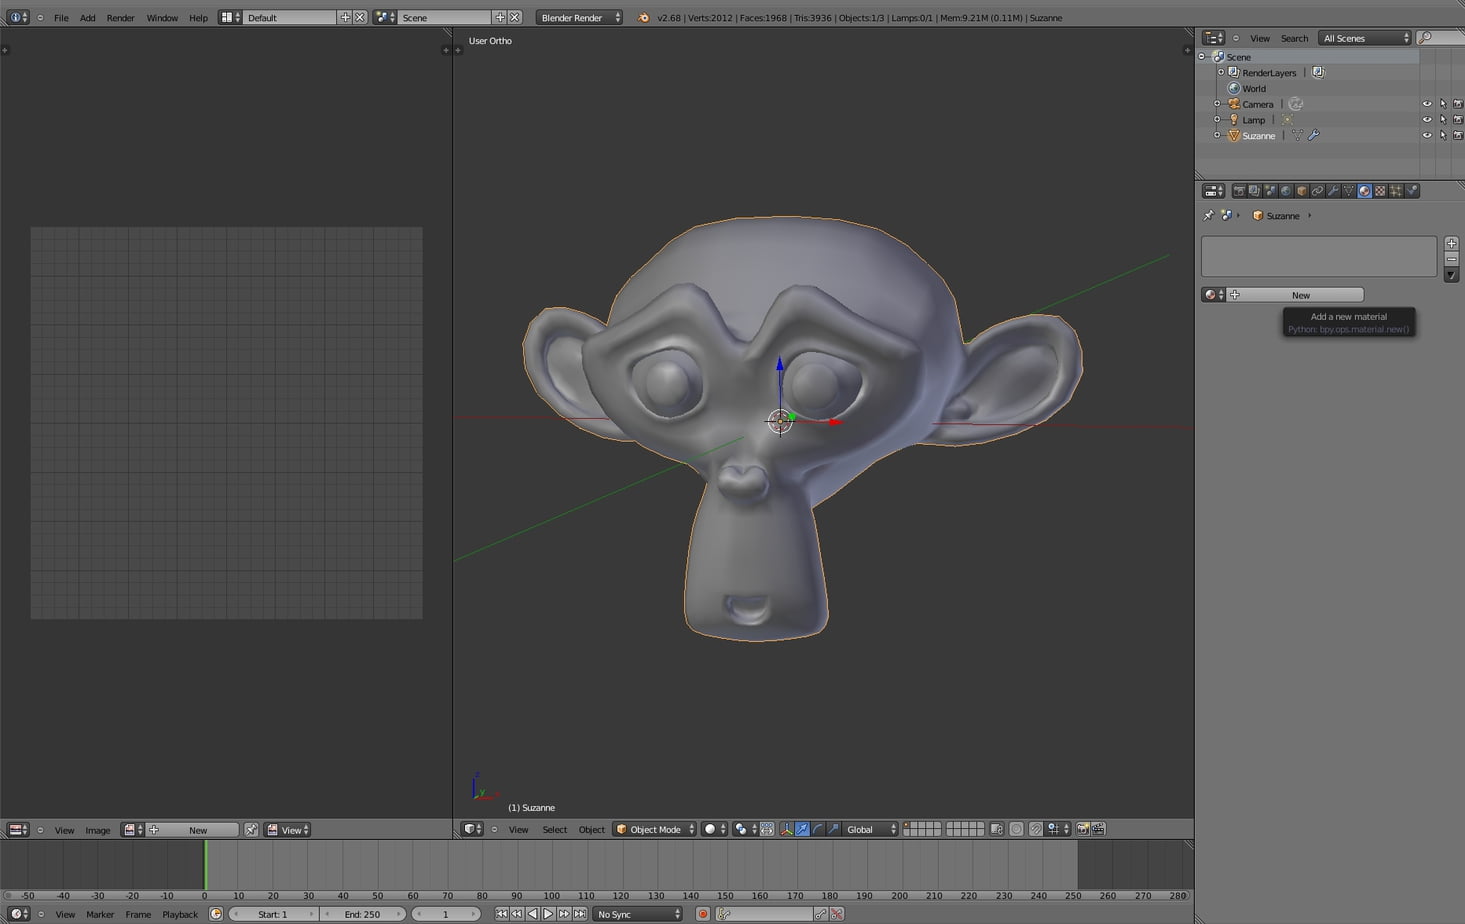
Our little monkey wants to wear lipstick!
Let's try to paint the lips: we notice how while we act on the model our texture is colored too.

Save the image in theUV editor, with F3 and we also save the scene.
We can have a lot of fun creating the make up of our model, the only limit is our imagination!
We can also use photos to project them as stencils to get a more realistic result, but this process is quite complex, we will address it in another tutorial.
Once finished painting, the same painted texture will be used as a texture in our material.
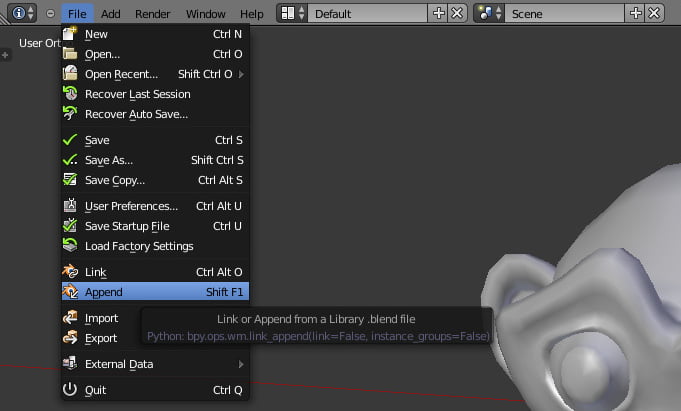
It is better to keep two separate files, one for the painting and one to assign the material. It is very important not to change the UV differently in the two scenes.
For texture painting it may be practical to merge the file from the original scene with the command append from the file menu: select the file with the original object, select object and choose the model.
Once the map is complete, we can assign it to the model as above, via material. We check that it is displayed correctly.
Now we can export the object for printing!
Export the file correctly for printing with multicolor powder
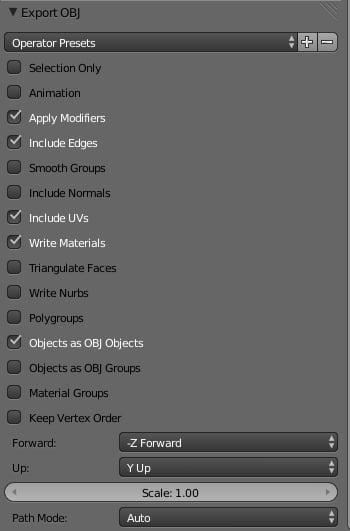
The 3D format that manages materials and colors is the format OBJ, which creates a small file .mtl containing information on the materials used.
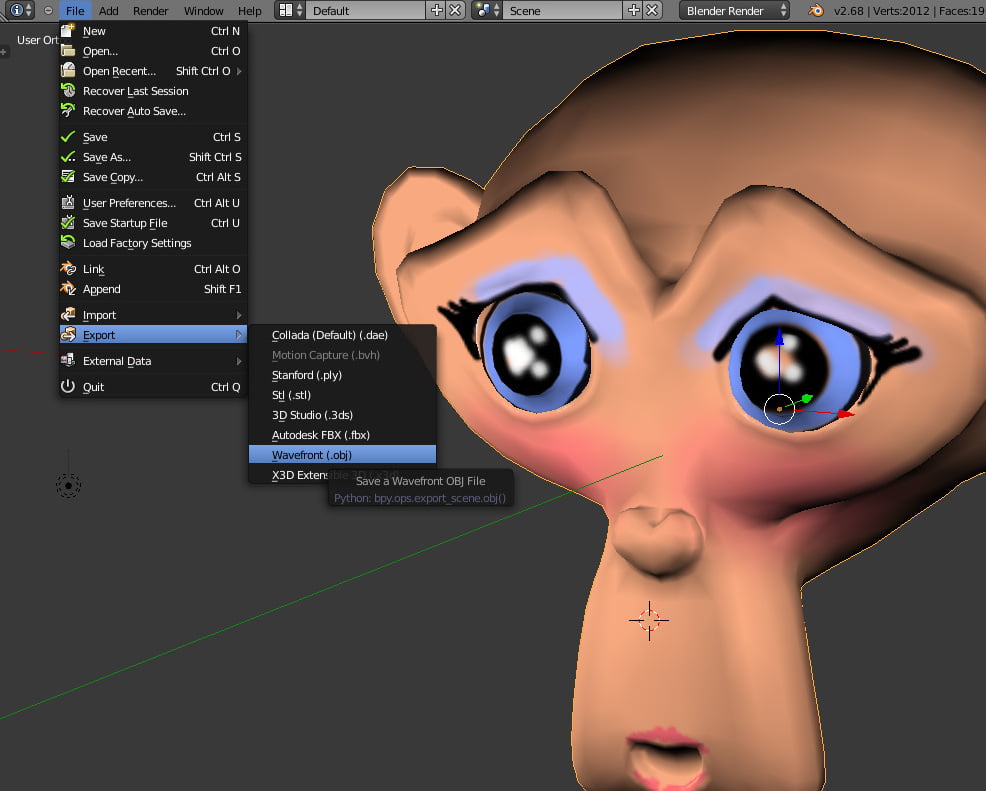
In the save window, we need to make sure that the options are selected includes UV is write materials.
To upload the file for the 3D printing with multicolor powder. We must create a archive .zip containing:
- file OBJ
- file .mtl
- any images .jpg and / or .png used for the map
In the absence of the .mtl file or images the .obj file will be completely white!
Our little monkey is ready to be printed!
We can upload our .zip file to the upload page and select the material multicolor powder (the only material capable of printing multi-colored models).
... Ta daan!

[fbshare type = "button"]
[fblike style = "standard" showfaces = "false" width = "450" verb = "like" font = "arial"] [pinterest count = "horizontal"] [google_plusone size = "standard" annotation = "none" language = "English (UK)"] [twitter style = "horizontal" float = "left"]